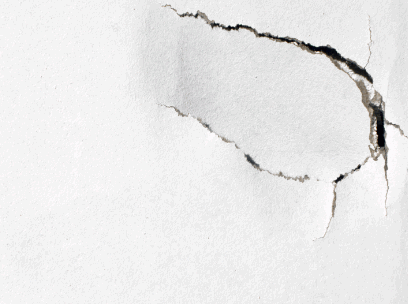
Plaster walls can add a classic touch to any home, but over time they can become damaged from various factors such as water damage, settlement, or impact.
We will discuss the tools needed for plaster wall repair, as well as step-by-step guides on how to repair small cracks and large holes in plaster walls.
Whether you’re a DIY enthusiast or looking to save money on repairs, this article will guide you through the process with ease.
What Are Plaster Walls?
Plaster walls are a type of wall construction that involves applying a layer of plaster over a framework of wooden lath strips, providing a smooth and durable surface for interiors.
The history of plaster walls can be traced back to ancient Egypt where they were used for both decorative and practical purposes. Over time, this technique spread to other parts of the world, becoming a popular method of wall construction in residential and commercial buildings.
Plaster walls have several advantages, including their ability to create a seamless and elegant finish that adds a touch of sophistication to any space. They are also known for their durability, with properly maintained plaster walls lasting for many years.
One of the disadvantages of plaster walls is their susceptibility to cracking and chipping, especially in older structures. Despite this, the aesthetic appeal and durability of plaster walls continue to make them a popular choice, with many homeowners and businesses opting for this classic wall finish.
Explore further: How To Strip Wallpaper Without Damaging Plaster
What Causes Damage To Plaster Walls?
Damage to plaster walls can be caused by a variety of factors including water infiltration, structural settlement, and physical impact.
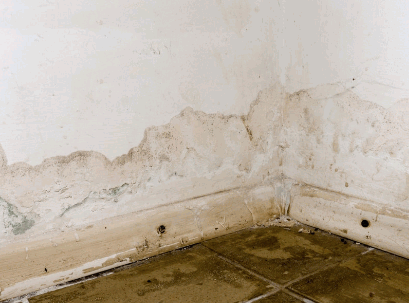
Water Damage
Water damage to plaster walls usually occurs when there is a leak or excessive moisture, causing the plaster to weaken and deteriorate over time.
Common sources of water damage in homes can include leaky roofs, burst pipes, malfunctioning appliances, and high humidity levels. These issues can lead to water seeping into the walls, ceilings, and floors, creating the perfect environment for mold growth and structural damage.
Signs of water damage may manifest as peeling paint, musty odors, warped wood, or discolored spots on walls and ceilings. It is crucial to address water damage promptly to mitigate the risk of extensive repairs and the potential health hazards associated with mold and mildew.
Settlement Or Shifting Of The House
Settlement or shifting of the house can lead to cracks in plaster walls as the structural movement places stress on the rigid plaster surface.
The natural settling of a house occurs over time as the soil beneath adjusts to the weight of the structure. This gradual process is usually uniform and can lead to minor cracks that can be easily patched. More dramatic shifts in the foundation can result in larger, diagonal cracks that may be a sign of a more serious issue.
Foundation problems such as uneven settlement or soil erosion can exacerbate cracking in the walls, leading to noticeable damage. In some cases, seismic activity can also cause sudden and severe structural movement, resulting in significant cracks that need immediate attention.
Identifying settlement-related cracks involves inspecting the size, direction, and pattern of the cracks. Horizontal cracks, especially wider at the top, can indicate foundation settling or potential structural issues. Vertical cracks that are wider at the bottom may signal heaving, which is the opposite of settling.
Addressing settlement-related cracks typically involves consulting a professional to assess the foundation and structural integrity of the house. Depending on the severity of the issue, solutions may range from simple cosmetic repairs to extensive foundation stabilization measures.
Impact Damage
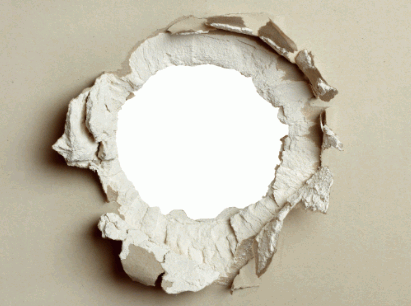
Impact damage to plaster walls typically results from physical force, such as furniture bumps or accidental hits, leading to holes and dents.
Common scenarios causing impact damage often include moving furniture around a room, children playing indoors, or simply walls getting hit during renovation work. These impacts can leave various types of damage, ranging from small dents to larger holes.
Understanding the extent of the damage is crucial to determining the appropriate repair method. Assessing the size and depth of the holes or dents is the initial step in the repair process. This helps in planning the right tools and materials needed for a successful restoration of the plaster walls.
What Tools Are Needed For Plaster Wall Repair?
Repairing plaster walls requires a variety of tools to ensure a smooth and durable finish, including plaster patching compounds, putty knives, and sandpaper.
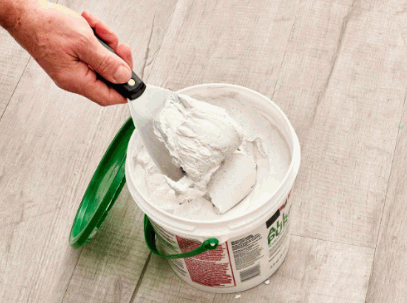
Plaster Patching Compound
Plaster patching compound is essential for repairing cracks and holes in plaster walls, providing a strong and cohesive fix.
There are different types of patching compounds available to suit various needs. Some are designed specifically for plaster walls, offering excellent adhesion and strength. Others are more versatile and can be used on different surfaces.
When mixing the compound, following the manufacturer’s instructions is crucial to ensure the proper consistency. Applying the compound smoothly and evenly over the damaged area is key to achieving a seamless finish. It’s essential to feather out the edges to blend the patch with the surrounding wall. Using a putty knife or trowel can help achieve a professional-looking result. Allowing sufficient drying time and sanding gently between layers will contribute to a flawless final outcome.
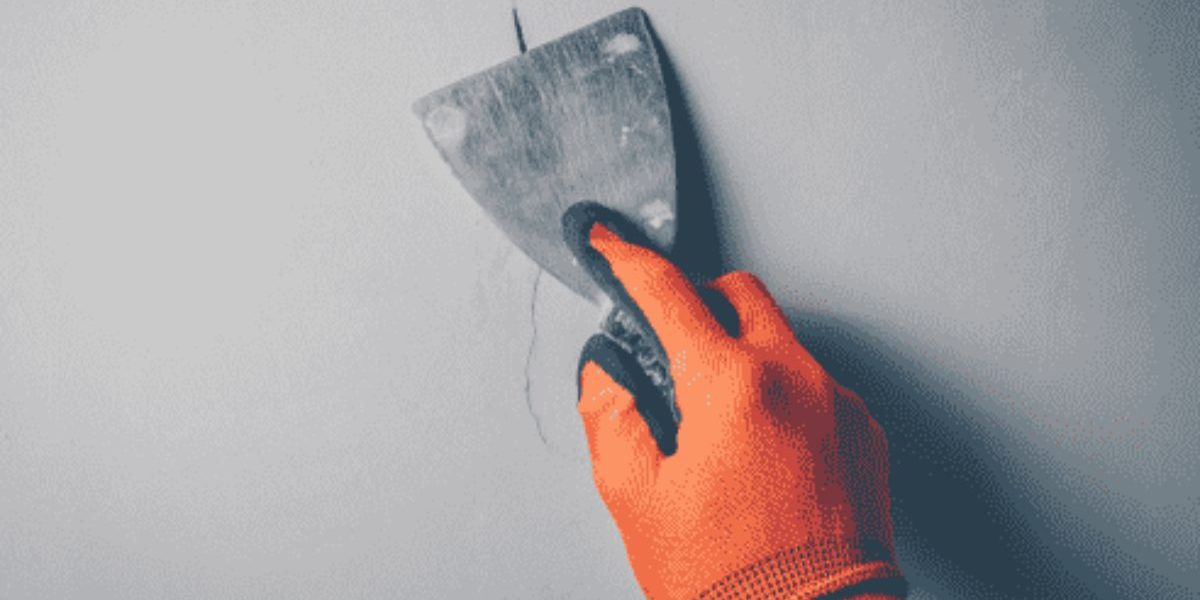
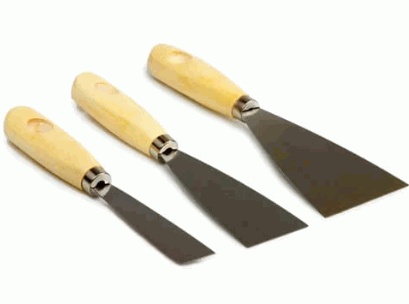
Putty Knife
A putty knife is used to apply the plaster patching compound to the damaged areas, helping to spread it evenly and smoothly.
Putty knives come in various sizes and shapes, including flexible blades for delicate applications and rigid ones for tougher jobs. For small repairs, a narrow blade works best, while broader blades are suitable for larger surfaces. When using a putty knife, hold it at a slight angle and apply pressure to the handle for better control and precision.
To clean a putty knife, wipe it down with a damp cloth immediately after use to prevent the compound from hardening. Regularly inspect the blade for any nicks or rust, and sharpen it if needed to maintain its effectiveness.
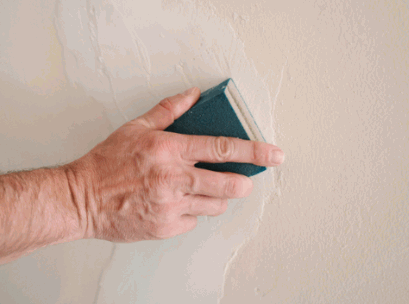
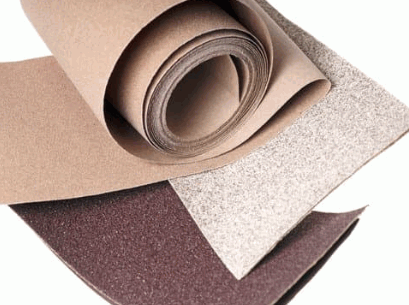
Sandpaper
Sandpaper is used to sand and smooth the repaired surface of the plaster wall, ensuring that it is even and ready for painting.
There are various grits of sandpaper that can be utilized based on the specific needs of the project. Coarse grits, such as 40-60, are excellent for removing thicker layers of material or smoothing rough surfaces. Medium grits, like 80-120, are suitable for general sanding tasks and prepping surfaces for finishing. Fine grits, ranging from 150-240, are perfect for final smoothing and achieving a polished finish.
When sanding plaster, it is essential to use a gentle touch and light pressure to avoid damaging the wall. Safety precautions, such as wearing a mask to protect against dust inhalation and gloves to shield your hands, should always be observed while sanding to ensure personal well-being.
Joint Compound
A joint compound is often used in conjunction with plaster patching compounds to create a smooth and seamless finish on repaired plaster walls.
One of the primary applications of joint compounds is to fill in gaps, cracks, and holes in walls, providing a solid base for painting or wallpapering. Mixing joint compound involves adding water gradually and stirring until a smooth, lump-free consistency is achieved. When applying the compound, it is important to use a wide taping knife to spread it evenly over the damaged area, followed by feathering the edges to blend seamlessly with the rest of the wall. This technique helps create a professional-looking finish that matches the existing wall texture.

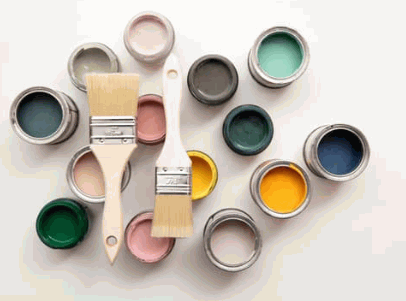
Paint And Paintbrush
Once the plaster repairs are complete, paint and a paintbrush are used to finish the wall, restoring its original appearance.
Choosing the right type of paint is crucial to ensure durability and a professional-looking outcome. For interior walls, latex paint is commonly preferred due to its easy cleanup and quick drying time. On the other hand, oil-based paints are ideal for high-traffic areas where durability is essential.
Before diving into painting, it’s essential to prepare the surface properly. This involves cleaning the wall to remove dust and debris, filling any holes or cracks with spackling compounds, and sanding down rough areas for a smooth finish.
To achieve a uniform look, consider applying a primer before painting. This helps the paint adhere better and provides a consistent base for the topcoat. When painting, use long, even strokes to avoid visible brush marks and work from top to bottom for a seamless finish.
How To Repair Small Cracks In Plaster Walls?
Repairing small cracks in plaster walls involves a few simple steps that can restore the wall to a smooth and durable condition.
Clean And Prep The Area
The first step in repairing small cracks in plaster walls is to clean and prep the area, ensuring it is free of dust and debris.
To achieve this, you can use a small brush or a vacuum cleaner to remove any loose particles and dirt from the crack. Ensure that the area is thoroughly cleaned to ensure a smooth repair process. Next, it is important to prepare the surrounding area by gently sanding the edges of the crack to create a smooth surface for the patching material to adhere to. This will help in achieving a seamless finish once the repair is completed.
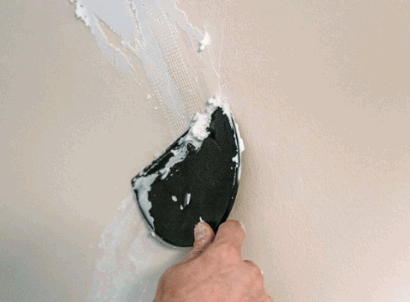
Apply Plaster Patching Compound
Next, apply the plaster patching compound to the crack, using a putty knife to spread it evenly and fill the gap.
When mixing the patching compound, ensure you follow the manufacturer’s instructions regarding water ratio and consistency to achieve the best results. It’s crucial to create a smooth paste with no lumps for easy application.
If the crack is deep, applying the compound in layers may be necessary. Allow each layer to dry completely before adding the next one to build up the patch gradually and avoid shrinkage.
Press firmly while smoothing the compound over the crack to ensure it adheres well to the existing plaster. This will help prevent future cracks and ensure a seamless finish.
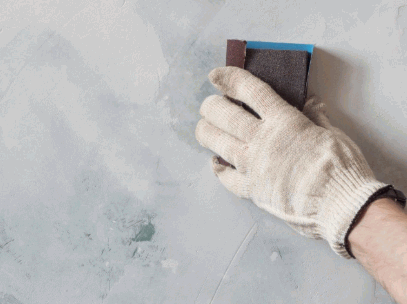
Sand And Smooth The Surface
Once the patching compound has dried, sand and smooth the surface to ensure it matches the rest of the wall.
In terms of sanding, choosing the right type of sandpaper is crucial for achieving a flawless finish. Sandpaper comes in various grits, ranging from coarse to fine. Coarse grits like 40-60 are ideal for removing paint or smoothing rough surfaces, while finer grits like 120-220 are better for achieving a polished finish. Always start with a coarser grit and gradually move to finer grits for optimal results.
Technique plays a significant role in sanding. Use gentle pressure and circular motions to avoid uneven patches on the surface. Make sure to sand in the direction of the grain for an even finish. Remember to periodically check the smoothness by running your hand over the sanded area.
To prevent damage to the surrounding area while sanding, consider using masking tape to protect adjacent surfaces. This simple step can save you from accidental scratches or dings on areas you want to keep intact. Also, regularly clean the sandpaper to prevent the buildup of debris that can cause scratches on the surface.
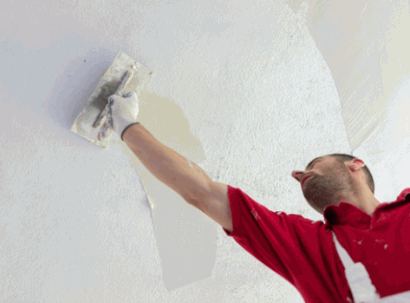
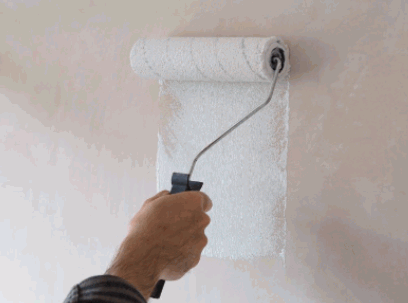
Paint The Repaired Area
Paint the repaired area to blend it seamlessly with the rest of the wall and restore its original appearance.
When selecting paint for touch-ups, make sure to match the color and finish of the existing wall paint. This will ensure a cohesive look. Consider using a small roller or brush for precision when applying the paint.
Preparation of the surface is crucial for a flawless finish – fill any holes or cracks, sand the area smooth, and clean off any dust or debris before painting. Applying primer before the final coat can help the new paint adhere better and provide a more even finish.
How To Repair Large Holes In Plaster Walls?
Repairing large holes in plaster walls is a more involved process that requires careful preparation, support installation, and multiple layers of patching compound.
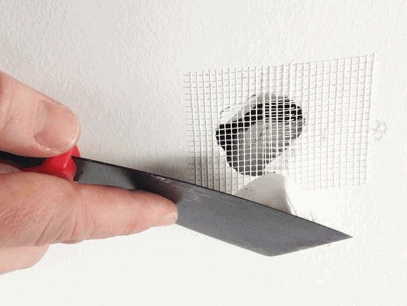
Cut Out Damaged Area
The first step in repairing large holes in plaster walls is to cut out the damaged area, creating a clean and stable opening for the patch.
For this task, you will need a few essential tools such as a utility knife or drywall saw for the actual cutting process. The utility knife is great for smaller holes, while a drywall saw works best for larger openings. When cutting, it’s crucial to follow the outline of the damaged area carefully to ensure a precise cut. Always work slowly and steadily to avoid damaging the surrounding plaster.
Install Support For Patch
Next, install support for the patch by attaching a piece of lath or wallboard behind the hole to provide a stable base for the repair.
To ensure a precise fit, measure the dimensions of the hole and cut the support material to fit snugly behind it. Use a saw or cutting tool to carefully trim the lath or wallboard to the required size.
- Position the cut piece behind the hole and secure it in place using screws or adhesive, depending on the material and preference. Make sure it is firmly attached to provide adequate support.
- Check the alignment and level of the support material to ensure it is flush with the surrounding plaster. Use a level or ruler to make any necessary adjustments.
Apply Plaster Patching Compound
Apply the plaster patching compound in thick layers, building up the surface gradually until it is level with the surrounding wall.
It is crucial to allow each layer to dry fully before adding the next, as this helps prevent cracking and ensures a strong bond with the underlying wall.
To achieve a smooth and seamless finish, consider using a wide putty knife or trowel to spread the compound evenly. Gentle feathering at the edges can help blend the patch with the surrounding area for a seamless result.
For larger repairs, applying fiberglass tape over the patched area before adding additional layers can provide extra reinforcement and prevent future cracks.
Sand And Smooth The Surface
Once the patching compound is dry, sand and smooth the surface to achieve a seamless blend with the existing plaster wall.
In terms of sanding, choosing the right sandpaper is crucial for achieving a professional finish. For initial sanding and smoothing out rough patches, start with a low-grit sandpaper, around 60 to 80 grit. This will help remove excess compounds and level the surface efficiently.
As you progress, gradually move to higher-grit sandpaper, such as 120 to 150 grit, for finer sanding and achieving a smoother texture. Ensure to sand in the direction of the wall grain to prevent any visible scratches or marks on the repaired area.
Paint The Repaired Area
Paint the repaired area to match the rest of the wall, ensuring a uniform and professional-looking finish.
When selecting the right paint, opt for a high-quality product that matches the existing wall color for a seamless blend.
- Prepare the surface by cleaning it thoroughly and repairing any imperfections such as cracks or holes.
- Use painter’s tape to protect surrounding areas and create crisp, clean edges.
- Apply the paint using smooth and even strokes, starting from the edges and working towards the center.
By following these techniques, you can achieve a flawless finish that seamlessly integrates with the surrounding wall, providing a polished appearance to your space.

Comments